Hi everyone! Back again on this lovely Saturday, but this time with another tutorial. I received this gorgeous ombre striped ITY from The Material Girls* and knew it’d make a perfect maxi skirt. After browsing and sifting through patterns I already owned, I didn’t come across anything that was exactly what I wanted. With a general knowledge of how garments are created and a few measurements, it didn’t take me long to create the skirt of my dreams. You can too, by following this tutorial!
Most maxi skirt patterns are super simple. Just a waistband attached to two gathered rectangles. Though it works, personally I feel like it produces a very “straight” look. I already have a straight figure and like the illusion of more curves wherever I can get em, so I knew I wanted to add some flair to the hip and through to the bottom of the skirt. If you have a rectangular maxi skirt pattern already printed, you can slash and spread it to get the look, but since I used measurements only and didn’t want to bother with paper, I won’t be showing that method. I guarantee this is still super easy! The only materials you need are knit fabric (amount determined by length of skirts you need) and a piece of elastic!
Start by measuring yourself to determine the length of the skirt. Measure from wherever you would want to the skirt waistband to sit, keeping in mind the height of your finished waistband and hem. I had on some high waisted leggings, so I just measured from the bottom of this waistband down, since I wanted my skirt to sit high on my hips, in relatively the same place. My decided length was 40″ long. I added a little extra length to account for wearing heels in the future, but choose what’s best for your taste.

Once I had this measurement, there were a couple more I needed to figure out how to cut my skirt. My high hip measurement was 28″. I then divided that by 2 to determine the required waistline of each front and back skirt. This gave me 14″. Because I wanted my skirt gathered a lot, I then multiplied 14″ by 2.5. This gave me 35″, which is the entire waist length of each skirt. Since I cut on the fold for these, the measurement of importance is 17.5″ for the waist of the front and back skirts while folded. Fold your fabric in half from selvage to selvage for the next steps.
Easy waist measurement formula is (waist/hip measurement divided by 2) x 2.5 = skirt waist total then skirt waist total divided by 2.


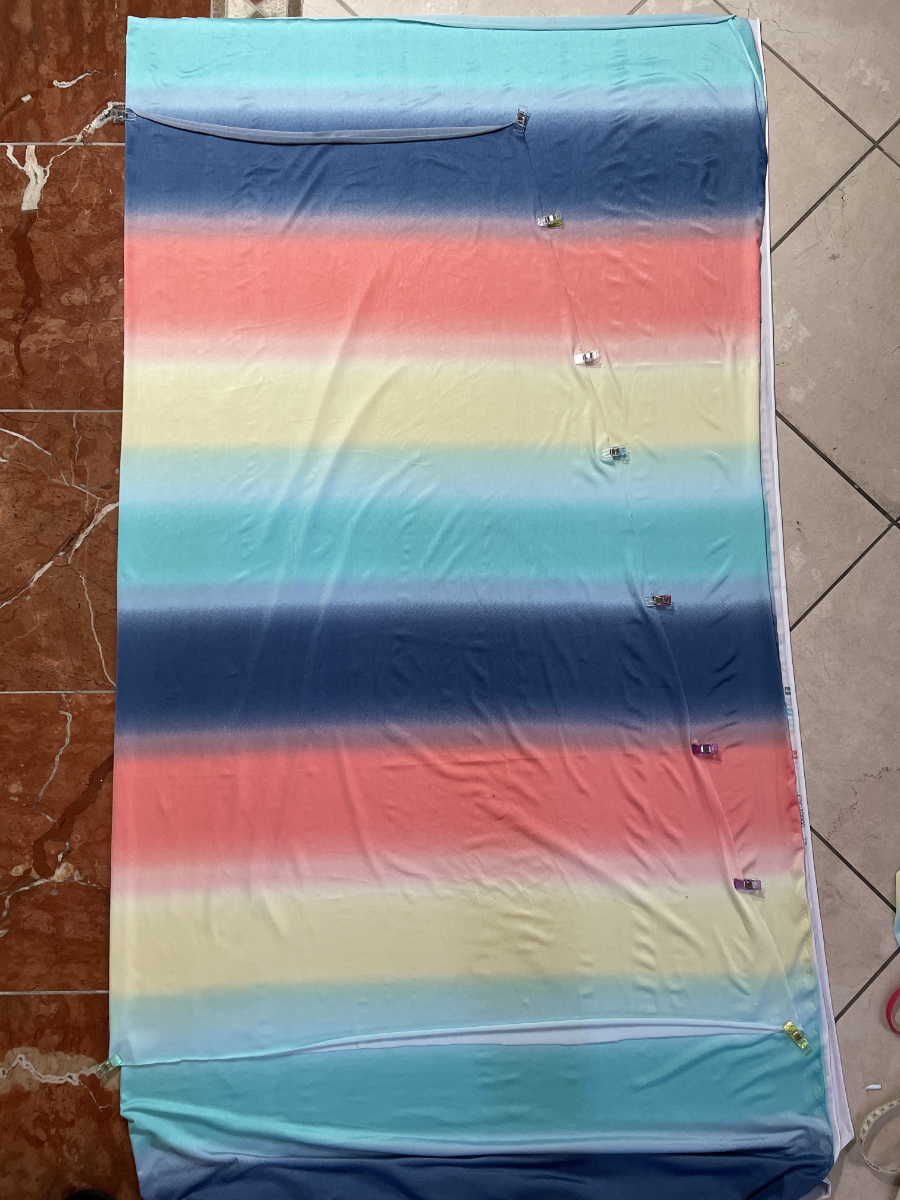
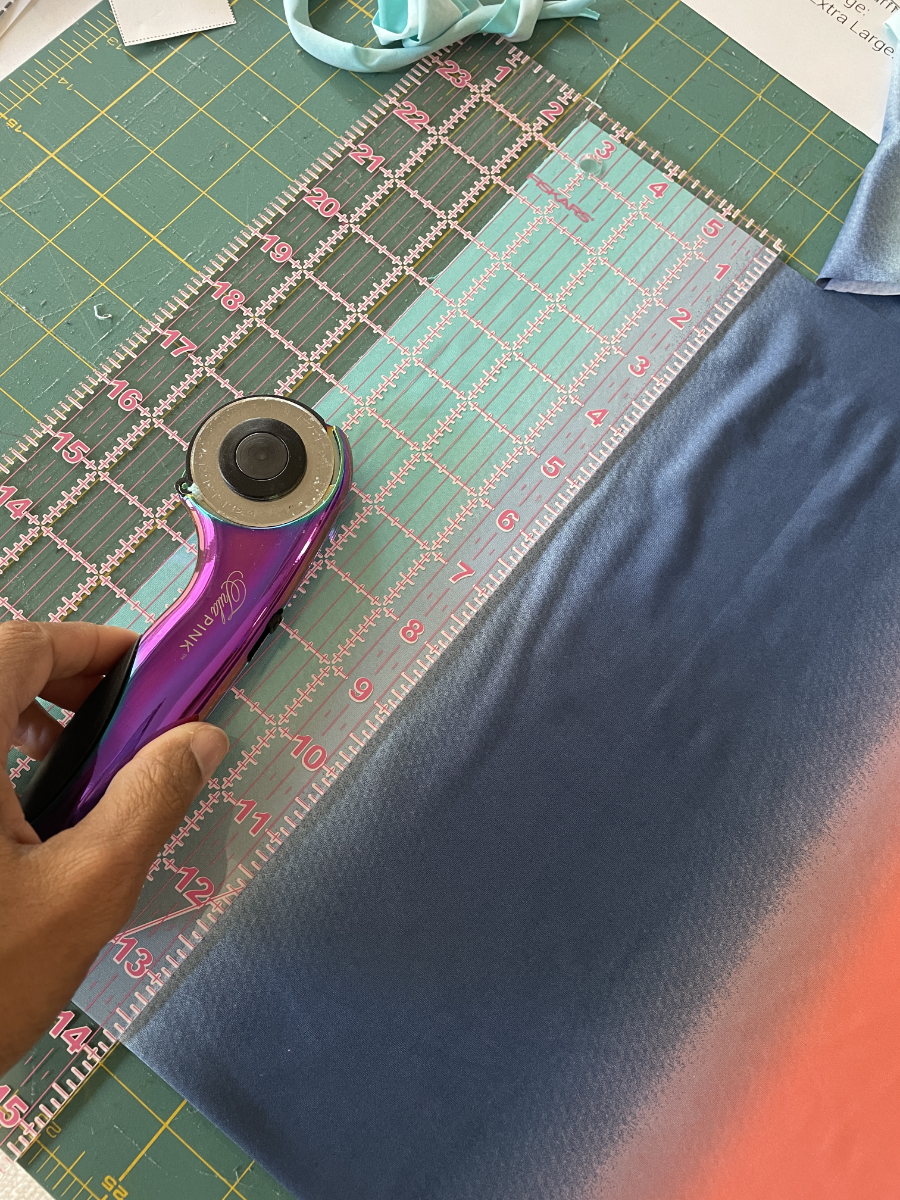
I used clips to roughly mark my measurements. I also marked the length on the selvage edge of the fabric, as well. Because I was using a striped fabric, it was easier to follow those lines, but a yardstick or quilting ruler may be more helpful to you. Once the length and waist were marked, I used my measuring tape to make a line from the end of my waist measurement to the selvage mark at the bottom, and then cut out the fabric using these measurements.


Once you have your first skirt cut, you can either do the same process to cut the second one or just place the first on top of your fabric and cut another. I wanted my stripes to match, so I chose the latter method. Once the other is cut, place them both right sides together and sew together at side seams.

For creating the waistband, you will need to consider how tall you want the finished band to be. I had 1.5″ elastic to use, so my finished band height needed to accommodate this. Double the elastic height was 3″ plus 1/2″ for the total seam allowance (I used 1/4″) equaled 3.5″. For the waistband length, I used the same measurement from the beginning for my high hip (28″). I cut my elastic 2″ shorter. Waistband was 3.5″ tall x 28″ in length, elastic was 26″.
Easy waistband formula is (elastic width x 2) plus (seam allowance x 2) = waistband height. Width is waist/hip measurement used to calculate skirt waist.
Once your waistband is cut, go ahead and sew the two short ends together to form a loop. Afterward, fold it in half with the wrong sides together and divide into four equal parts, with the waistband seam marking your back center.


At this point, the skirt waist is incredibly wide in comparison to the waistband. We will need to gather it to fit. There are several methods for gathering (choose your fav). My personal ol’ faithful is the two rows method. Before doing so, I mark the front and back center of my skirt with a marker so I know where to match up on the waistband. To gather, I set my machine to a 5 length straight stitch and sew 1/2″ from the edge, making sure to leave tails on each end, then go back and sew another row 1/4″ from the edge in the same manner. Make sure not to sew over your tails, because you will need them to adjust your gathers. Once this you’ve gathered, adjust (tighten or loosen, depending on how you gathered) until the skirt waistline matches the waistband.


Insert the waistband inside the skirt. I prefer to attach my waistbands on the inside with my gathers on the outside, but you can totally sew it the opposite way, if you prefer. What matters is that the skirt and waistband are right sides together. Make sure the raw edges of the waistband align with your gathered skirt edge. Pin or clip it together, but mark a 2″ or so opening that you don’t sew so you can insert the elastic. Sew the waistband and skirt together using a serger or a zigzag stitch, making sure to leave that opening!


Once you’ve sewn, use a bodkin, safety pin, or other tool to insert the elastic into the waistband opening. Loop it all the way around until it come back out the other end. Overlap about 1/2″, Make sure the elastic did not twist inside the waistband, then sew the ends together with a zigzag stitch.


Stretch elastic to fully pull it inside of the waistband. Shift the elastic until the seam meets with the seam of the waistband. Place a pin through the seam to keep them aligned. Pin or clip your opening closed and sew it up, taking care not to sew on your elastic. Once it’s sewn closed, use a seam ripper to remove your visible gathering stitches.


The last steps are to sew a few stitches in the back waistband seam to keep the elastic from twisting and keep the seams together. I use a stitch in the ditch foot on a 4 length straight stitch, backstitching at beginning and end. A regular foot is also fine, just use matching thread and take your time for a neat finish. Once you’re done with this, hem in your preferred method and rock that new maxi!


I hope you find this tutorial useful and love your skirt just as much as I do! Seriously I’m so in love with it, this is going to be my go-to for all the lightweight knit fabrics this summer. I think I may experiment with adding a slit to my next one…til next time, friends!! Use the hashtag #HeyShantelle on IG if you make a skirt using this tutorial. I’d love to see what you come up with!


*Any links containing asterisks within this post are affiliate links. The product price doesn’t change for you, but I do earn a small commission for your purchase. Thank you for supporting my love of sewing and sharing!
Discover more from Sincerely, Shantelle
Subscribe to get the latest posts sent to your email.


5 Comments
Janeen Durant
February 5, 2022 at 11:57 amThis looks so fun and simple how you explained it! Would this work with a moderately heavy knit? I plan on using a 2” wide elastic, with a tencel/ spandex knit.
Lakeisha
February 5, 2022 at 12:28 pmI don’t see why it wouldn’t as long as you’re comfortable with the excess weight haha! Mine was ITY and all of it added up. It stays in place though with the elastic waistband, so I didn’t mind it.
Lakeisha
February 5, 2022 at 12:28 pmAlso thanks for reading and commenting 🙂
Jasmine
January 15, 2026 at 9:13 amI made this skirt on a floral patterned knit and it turned out beautifully! Thank you for the in-depth instructions and pictures!
Lakeisha
March 4, 2026 at 6:50 pmAww, thanks Jasmine! I’m glad it worked for you. Wish there was a way to share a pic–I’d love to see it. Sorry for such a late reply.